An off-grid solar system gives you the power to generate your own electricity without relying on the utility company. You collect energy from the sun using solar panels, store it in batteries, and use it to run your home or cabin.
Setting up an off-grid solar system involves choosing the right solar panels, batteries, charge controller, and inverter. Then you connect them properly to create a complete power system.
Going off-grid means true energy independence. You won’t worry about power outages or monthly electric bills anymore.
Many people think building a DIY solar system is too complicated, but it’s actually manageable with some basic planning and the right components.
This guide walks you through everything you need to know about renewable energy for your property. You’ll learn what equipment to buy, how much it costs, and how to set it all up safely.
Whether you want to power a small cabin or your entire home, you can build your own system step by step.
Key Takeaways
- Off-grid solar systems let you generate and store your own electricity using solar panels and batteries
- You need four main components to build a working system: solar panels, batteries, a charge controller, and an inverter
- Proper planning and sizing your system based on your energy needs ensures reliable power and prevents costly mistakes
Understanding Off Grid Solar Power
Off-grid solar power lets you create electricity without relying on utility companies. You’ll generate and store your own energy using solar panels and batteries, which gives you complete control over your power supply.
What Does It Mean to Go Off Grid?
Going off grid means your home or property operates without any connection to the public electrical utility. You’re not plugged into the power lines that serve most neighborhoods and cities.
An off-grid solar system is a standalone power setup that handles all your electricity needs independently. Unlike grid-tied systems that can sell extra power back to utilities, you’ll store everything you generate in batteries for later use.
This approach to energy independence means you won’t receive monthly electric bills from a power company. You also won’t experience outages when storms knock down power lines in your area.
Your homestead becomes completely self-reliant for electrical power, though you’ll need to manage your energy production and consumption yourself.
How an Off Grid Solar System Works
Your solar panels convert sunlight into direct current (DC) electricity during daylight hours. This power flows to a charge controller, which regulates the voltage going into your battery bank.
The batteries store excess energy for use at night and on cloudy days. When you need to run household appliances, an inverter converts the DC power from your batteries into alternating current (AC) electricity that your devices can use.
The basic components work together like this:
- Solar panels capture sunlight and generate electricity
- Charge controller protects batteries from overcharging
- Battery bank stores energy for 24/7 availability
- Inverter converts stored power to usable AC electricity
You’ll need to size each component based on your daily energy consumption. If you use 5,000 watts per day, your panels must generate enough to cover that amount plus account for cloudy days and system losses.
Benefits of Off Grid Living
Self-sufficiency is the biggest advantage of off-grid solar power. You control your entire energy system and aren’t affected by rising utility rates or power company decisions.
You’ll avoid monthly electric bills completely once your system is installed. While the upfront costs are significant, you’re not paying $100 to $300 every month for grid electricity.
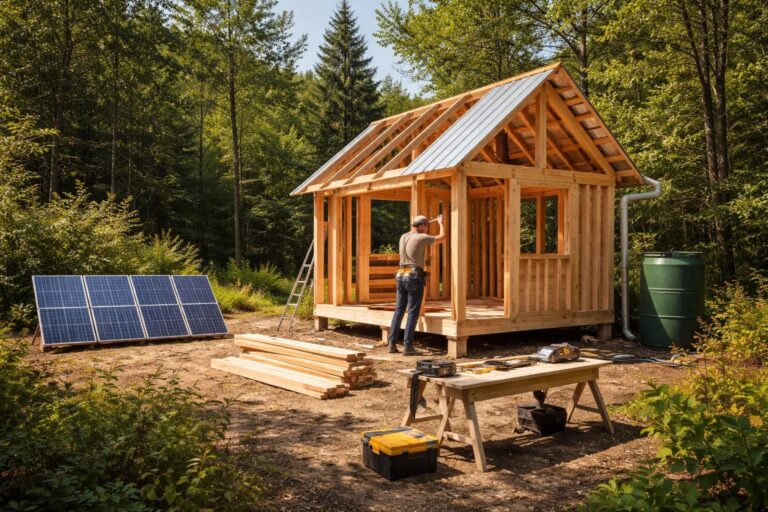
Off-grid living works especially well for remote cabins, farms, and properties where connecting to utility lines would cost thousands of dollars. You can build your own solar system in locations where traditional power infrastructure doesn’t exist.
Your environmental impact decreases since you’re using clean, renewable energy. You’re not relying on fossil fuel power plants that serve most electrical grids.
Is Off Grid Right for You?
Off-grid solar requires a bigger investment upfront compared to staying connected to utilities. You’ll spend $20,000 to $50,000 or more depending on your energy needs and system size.
You need to actively manage your power usage. On cloudy days or during winter months, you might need to reduce consumption or run a backup generator.
This lifestyle demands more attention than simply flipping a switch with grid power.
Consider these factors before committing:
- Your daily energy consumption and whether you can reduce it
- Available sunlight in your location throughout the year
- Your budget for initial equipment and installation
- Willingness to monitor battery levels and system performance
- Local building codes and regulations about off-grid systems
Many states also restrict residents from connecting DIY systems to the power grid, which affects your options. You’ll want to check your local requirements before starting any installation work.
Planning Your Off Grid Solar Setup

Getting your system size right from the start saves money and frustration. You need to know how much power you actually use, how much sunlight hits your location, and how many backup days your batteries should cover.
Calculating Daily Energy Consumption
Start by listing every device you plan to power in your remote cabin or off-grid home. Write down the wattage for each item—you can find this on labels, in manuals, or with a quick online search.
Multiply each device’s wattage by the hours you’ll use it daily. A 60-watt laptop running 4 hours uses 240 watt-hours.
A 100-watt fridge running 24 hours needs 2,400 watt-hours.
Add up all your watt-hours to get your total daily energy consumption. Most beginners start between 1,000 and 3,000 watt-hours per day.
Convert this to kilowatt-hours by dividing by 1,000—so 2,400 watt-hours equals 2.4 kWh.
Don’t forget to add 20% extra for system losses from wiring, inverters, and battery inefficiency. If you calculated 2,000 watt-hours, plan for 2,400 to be safe.
Matching Solar Power to Your Needs
Once you know your daily power consumption, you can size your solar panel array correctly. Divide your daily watt-hours by your location’s average peak sun hours.
If you need 2,400 watt-hours and get 5 peak sun hours daily, you need at least 480 watts of panels (2,400 ÷ 5 = 480). Round up to account for cloudy days and seasonal changes.
Your battery bank should store enough power for your days of autonomy—typically 2 to 4 days without sun. Multiply your daily consumption by the number of backup days you want.
For 2,400 watt-hours and 3 days of autonomy, you need 7,200 watt-hours (7.2 kWh) of battery capacity.
Understanding Peak Sun Hours and Site Assessment
Peak sun hours aren’t the same as daylight hours. They measure the equivalent hours of full 1,000-watt sunlight per square meter your location receives daily.
Southern states typically get 5 to 6 peak sun hours year-round, while northern areas might drop to 3 to 4 hours in winter. Check online solar maps or weather data for your specific area.
Walk your property and identify the best mounting location. You need a spot with no shade from trees or buildings between 9 AM and 3 PM.
South-facing placement works best in the Northern Hemisphere. Consider seasonal sun angles too.
Winter sun sits lower in the sky, so proper site assessment helps you avoid shadows that cut your system’s output in half.
Essential Components of an Off Grid Solar System
Your off grid solar system needs four main parts to work correctly. Solar panels capture sunlight, charge controllers manage power flow to batteries, battery banks store energy for later use, and inverters convert that stored power into electricity your appliances can use.
Solar Panels: Types and Sizing
You have three main types of solar panels to choose from. Monocrystalline panels are the most efficient option at 18-22% efficiency and last 25 years or more.
Polycrystalline panels cost less but offer slightly lower efficiency at 15-17%. Thin-film panels are flexible and lightweight but much less efficient, so they’re only practical for RVs or portable setups.
Panel wattage typically ranges from 300W to 450W per panel in 2025. To size your system, calculate your daily energy needs first.
If you use 5 kWh per day, you’ll need about 1,500-2,000W of solar panel capacity to account for weather and seasonal changes.
Your mounting hardware matters for performance. A roof mount saves ground space but makes cleaning harder.
Ground mount systems let you adjust the angle seasonally and are easier to maintain. Face panels south in the northern hemisphere and tilt them at an angle matching your latitude.
Solar Charge Controllers: MPPT vs. PWM
Your solar charge controller prevents battery overcharging and manages power flow from panels to your battery bank. You need to pick between two types: PWM and MPPT.
PWM controllers are cheaper at $100-200 but less efficient. They work by pulling down the panel voltage to match battery voltage, wasting the extra power.
Use PWM only for small systems under 1,000W where cost matters more than efficiency. MPPT charge controllers cost $200-400 but harvest 20-30% more energy from your panels.
They convert excess voltage into additional current, maximizing power transfer to batteries. An MPPT charge controller is essential for larger systems or when you have long wire runs between panels and batteries.
Size your charge controller based on your solar panel capacity. If you have 2,000W of panels at 24V, that’s about 83 amps, so you’d need a 100A controller with some safety margin.
Battery Bank and Storage Options
Your battery bank determines how much energy you can store for nighttime and cloudy days. Battery capacity is measured in kilowatt-hours (kWh), and you need enough to cover at least 1-2 days of use.
Lead-acid batteries cost around $100 per kWh but only let you use 50% of their capacity safely. Their depth of discharge limitation means a 10 kWh lead-acid bank only gives you 5 kWh of usable power.
They also need water level checks every few months. LiFePO4 batteries (lithium iron phosphate) cost $300-500 per kWh but last 10+ years.
LiFePO4 battery technology allows 80-90% depth of discharge, so you get much more usable power. A 10 kWh lithium-ion battery bank provides 8-9 kWh of actual energy.
These batteries include a BMS (battery management system) that protects against overcharging and temperature issues. For a home using 5 kWh daily, you’d want a 10 kWh battery bank minimum.
This gives you two days of backup with lithium batteries or one day with lead-acid batteries.
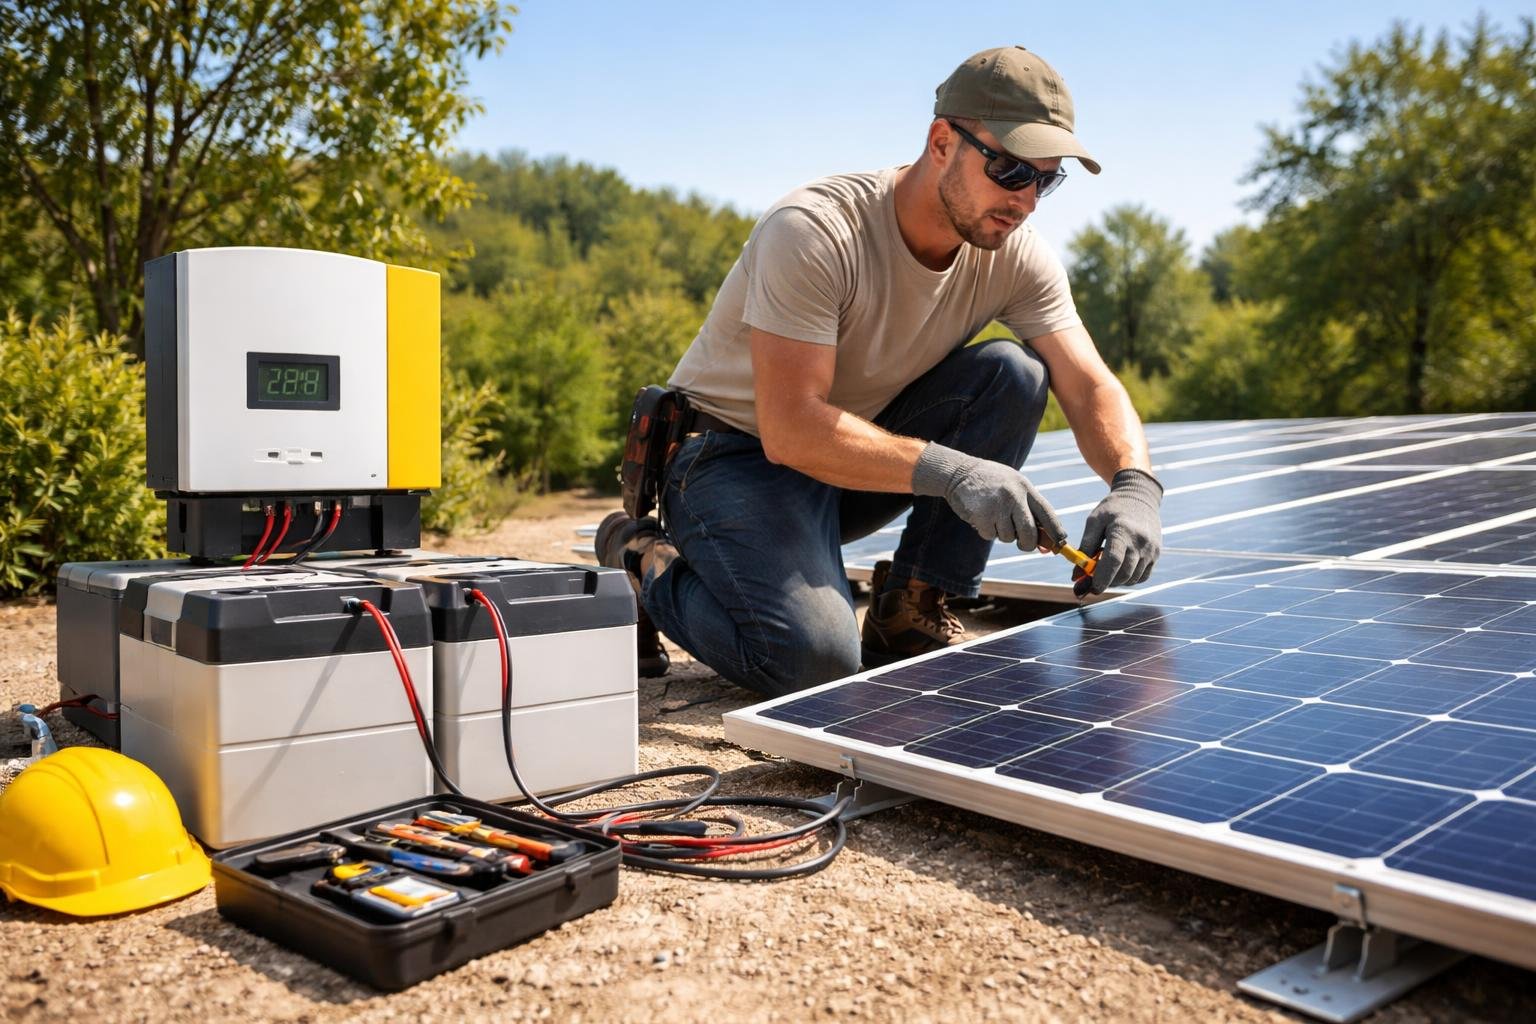
Inverters: Pure Sine Wave and Sizing
Your inverter converts DC power from batteries into AC power for household appliances. A pure sine wave inverter is required for sensitive electronics like computers, medical equipment, and modern appliances.
Modified sine wave inverters are cheaper but can damage equipment or cause buzzing in audio devices. Inverter size must exceed your peak power draw.
Add up the wattage of everything you might run simultaneously. If your refrigerator uses 600W, lights use 200W, and laptop uses 100W, that’s 900W total.
Buy a 1,500W inverter to handle startup surges, since motors and compressors draw 2-3 times their running wattage when starting. Most pure sine wave inverters cost $300-2,000 depending on capacity.
A 3,000W inverter handles most small homes. Larger properties need 5,000-6,000W models.
Look for inverters with surge capacity ratings that are double the continuous rating for reliable operation.
Step-by-Step DIY Off Grid Installation Guide
Installing a DIY off-grid solar system requires careful planning and attention to detail during each phase. The right wire gauge prevents power loss, proper connectors ensure safe connections, and secure mounting protects your investment from weather damage.
System Diagram and Design Basics
Before you touch a single wire, sketch out your complete system diagram. This doesn’t need to be fancy—a simple drawing showing how your solar panels connect to the charge controller, then to the battery bank, and finally to the inverter will work.
Your diagram should include the location of disconnect switches between major components. These switches let you safely shut down parts of your system for maintenance or emergencies.
Mark the voltage of each component on your diagram. Most DIY solar setups run at 12V or 24V, but larger systems might use 48V.
Make sure all your components match the same voltage or you’ll run into serious problems. Include wire runs and their approximate lengths.
This helps you calculate the right wire gauge and plan for voltage drop. Label positive and negative connections clearly—mixing these up can damage expensive equipment.
Wiring, MC4 Connectors, and Voltage Drop
Choosing the correct wire gauge is critical for your DIY off-grid solar installation. Undersized wires cause voltage drop, which means you lose power as heat before it reaches your batteries.
For most panel-to-controller runs under 20 feet, 10 AWG wire works fine. Battery connections need thicker wire—typically 6 AWG or 4 AWG—because they carry more current.
Longer wire runs always need thicker gauges to compensate for distance. MC4 connectors come standard on most solar panels and make wiring simple.
These weatherproof connectors snap together securely and won’t come apart in wind or rain. You’ll need an MC4 crimping tool or compatible connectors if you’re cutting and extending panel wires.
Always use stranded copper wire rated for outdoor use between panels. Inside your battery box or power cabinet, you can use solid core wire for fixed connections.
Add inline fuses or breakers on every positive wire leaving your battery bank—this protects against short circuits that could start fires.
Mounting Solar Panels Safely
Your panels need a solid foundation that can handle wind, snow, and years of weather exposure. Ground mounts work well for beginners because they’re easier to install than roof systems and you can adjust the angle seasonally.
Build or buy a frame that tilts your panels toward the sun. The ideal angle roughly matches your latitude, but you can adjust it steeper in winter and flatter in summer for maximum production.
Use stainless steel or galvanized hardware for all connections. Regular bolts will rust and fail within a year or two outdoors.
Leave a few inches of space under the panels for airflow—this keeps them cooler and more efficient. Secure the frame to concrete footings, ground screws, or heavy-duty stakes depending on your location.
Panels catch wind like sails, so anchoring matters more than most people think.
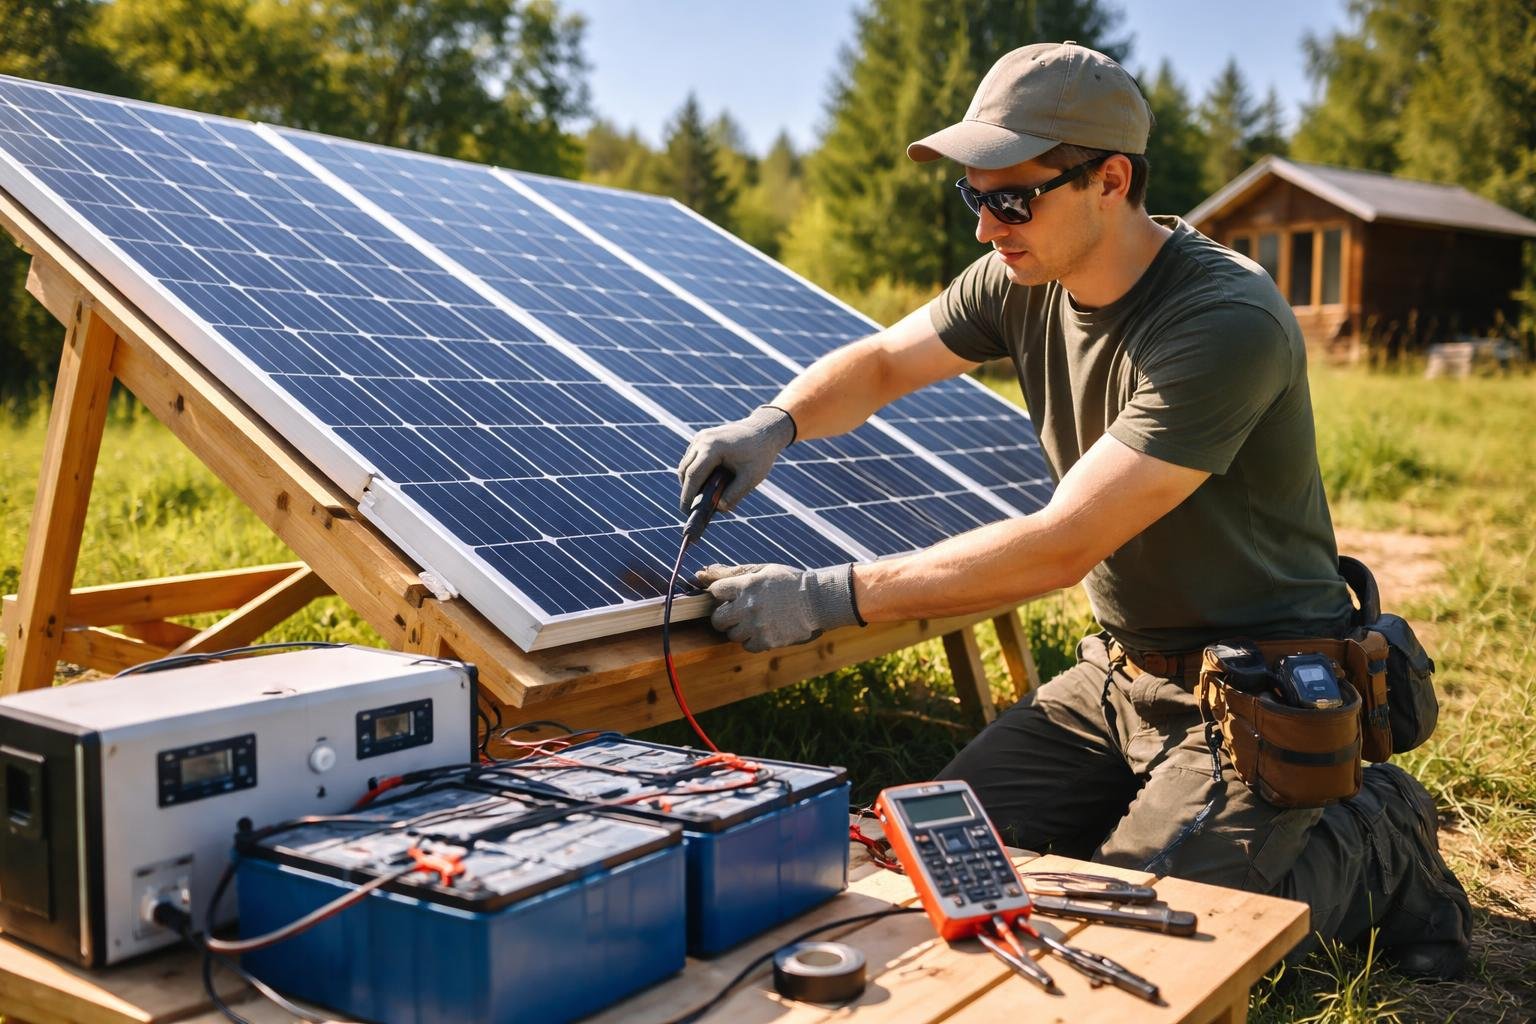
Testing and Monitoring Your System
Start testing before you connect everything together. Use a multimeter to verify each panel produces its rated voltage in direct sunlight.
Check battery voltage to confirm it matches your system design. Once connected, watch your charge controller display.
It should show incoming solar power during the day and proper charging voltage for your batteries. Most MPPT controllers have Bluetooth apps that make system monitoring much easier.
Install a battery monitor or shunt to track your actual power usage and battery state of charge. These devices show you exactly how many amp-hours you’re using daily, which helps prevent over-discharging your batteries.
Test all your disconnect switches to make sure they actually cut power when flipped. Run your inverter under load with a few appliances to verify it handles your expected power draw without errors or overheating.
Optimizing System Performance and Safety
Getting the most from your off-grid setup means focusing on efficiency improvements and proper maintenance routines. Simple changes to your daily habits and regular system checks can extend equipment life and reduce your overall energy needs.
Maximizing System Efficiency
Your solar panels lose efficiency when they’re covered in dirt, dust, or debris. Clean them every few months with water and a soft brush to maintain peak output.
Panel angle matters too. Adjust your panels seasonally if possible.
A steeper angle in winter and flatter in summer helps capture more sunlight year-round. Even a 10-15 degree adjustment can boost production by 10-20%.
Check all electrical connections twice a year. Loose or corroded connections create resistance that wastes energy as heat.
Tighten terminals and clean any corrosion with a wire brush and baking soda solution. Monitor your system’s performance through your charge controller display or app.
Watch for drops in production that could signal panel damage or wiring issues. Most systems should maintain 85-90% system efficiency under normal conditions.
Keep your battery bank at proper temperatures. Extreme heat or cold reduces battery capacity and lifespan.
Insulate battery boxes in cold climates or add ventilation in hot areas.
Energy Saving Tips for Off Grid Homes
Switch all lighting to LED lights which use 75% less power than traditional bulbs. A typical home can save 300-500 watt-hours daily just from this change.
Run major appliances during peak sun hours when solar production is highest. Do laundry, charge devices, and use power tools between 10am and 3pm to avoid draining batteries.
Invest in energy-efficient appliances rated for off-grid use. A standard refrigerator uses 1,200 watt-hours daily while an efficient model uses only 400-600 watt-hours.
Use a power meter to measure what your appliances actually consume. Turn off phantom loads.
Phone chargers, TVs, and computers draw power even when not actively in use. Add power strips to cut multiple devices at once.
Backup Generator Integration
A backup generator provides peace of mind during extended cloudy periods or unexpected system failures. Choose a generator sized for your critical loads plus battery charging.
Connect your generator through an automatic transfer switch or inverter-charger combo. This lets the system start the generator automatically when batteries drop below a set level.
Propane generators work best for off-grid applications. They start reliably in cold weather and fuel stores indefinitely without going bad like gasoline.
Run the generator at 80% capacity when charging batteries. This improves fuel efficiency and reduces wear compared to light loads.
Your charge controller should be rated to handle the generator’s output. Test your generator monthly even if you don’t need it.
This keeps fuel lines clear and ensures it will start when you actually need backup power for true self-reliance.
Maintaining Batteries and Troubleshooting
Check lithium batteries monthly for any error codes or warnings on the battery management system. Most issues show up on the display before they become serious problems.
Lead-acid batteries need more attention. Check water levels monthly and add distilled water when plates become visible.
Never add tap water which contains minerals that damage batteries. Equalize flooded lead-acid batteries every 30-60 days.
This controlled overcharge prevents sulfation and balances individual cell voltages. Your charge controller should have an equalization setting.
Watch for these warning signs: batteries that won’t hold charge, excessive heat during charging, or voltage that drops quickly under load. These signal failing batteries that need replacement soon.
Keep detailed logs of battery voltage, temperature, and state of charge. This data helps you spot problems early.
Many off-grid solar system setups benefit from cloud-based monitoring that tracks performance over time. If you’re not comfortable working with electrical systems, hire a professional for annual inspections.
They can spot issues you might miss and ensure connections meet safety codes.
Costs, Products, and Going Beyond the Basics
Setting up an off-grid solar system requires understanding what you’ll spend upfront and over time, which brands offer reliable components, and how to plan for future expansion as your energy needs grow.
Budgeting and Calculating Solar System Cost
Your solar system cost depends heavily on your daily energy consumption and desired backup capacity. A small cabin setup might run you $3,000 to $7,000, while a full home system typically ranges from $15,000 to $50,000.
Start by calculating your daily kilowatt-hour usage from your utility bills. Multiply this by 30 to get monthly consumption, then factor in battery storage for cloudy days.
The biggest expense is usually your battery bank. Lithium batteries cost more upfront than lead-acid options but last 10+ years versus 3-5 years.
You’ll also need to budget for solar panels, an inverter, charge controller, wiring, and mounting hardware. Don’t forget installation costs if you’re hiring professionals.
Labor can add 10-30% to your total project cost. Modular plug-and-play systems can reduce installation expenses significantly.
Popular Off Grid Brands and Products
Several manufacturers dominate the DIY solar market with proven track records. Renogy offers complete kits and individual components perfect for beginners, with solar panels ranging from 100W to 400W.
Rich Solar provides budget-friendly panels and charge controllers. Their 200W folding panels work well for portable setups.
EG4 has gained popularity for their all-in-one inverter systems and affordable lithium battery options. BougeRV specializes in flexible panels and portable power stations ideal for RVs.
SOK manufactures high-quality lithium iron phosphate batteries with built-in battery management systems. Ampere Time offers competitively priced lithium batteries in various capacities from 100Ah to 300Ah.
For charge controllers, brands like Victron and EPEVER deliver reliable MPPT technology. When choosing products, prioritize warranty length and customer support availability.
When to Consider Expanding or Upgrading
You’ll know it’s time to expand when your batteries frequently drop below 50% capacity or you’re regularly limiting appliance use. Monitor your system’s performance for at least three months before making expansion decisions.
Adding more panels is straightforward if you have roof space and your charge controller can handle the extra wattage. Battery expansion requires matching your existing battery chemistry and voltage.
Upgrading makes sense when your inverter struggles with startup surges from power-hungry appliances. A larger inverter lets you run air conditioners, well pumps, or power tools simultaneously.
Consider seasonal changes too. Winter months with less sunlight might reveal that you need additional battery capacity or more panels to maintain the same power availability you enjoyed during summer.
Frequently Asked Questions

New users often wonder about the planning steps needed before installation and how to choose the right equipment packages. Understanding the basic connection process and avoiding setup mistakes can save you time and money.
What do I need to know before starting with off-grid solar?
You need to calculate your daily energy consumption first. Add up the watts used by all your appliances and how many hours each day you run them.
Check the peak sun hours in your area. This tells you how much usable sunlight your panels will get each day.
Your location matters because someone in Arizona gets way more sun than someone in Washington. Figure out your budget for the whole system.
An off-grid setup includes solar panels, batteries, a charge controller, and an inverter. You should also understand basic electrical safety.
Working with DC power from batteries can be dangerous if you don’t follow proper procedures.
Can you walk me through a basic step-by-step process for installing solar panels?
Start by mounting the racking system on your roof or ground mount. Make sure it’s secure and angled correctly for your latitude.
Attach the solar panels to the racking. Connect the panels in series or parallel depending on your voltage needs.
Run the wiring from the panels to your charge controller. Use proper gauge wire rated for outdoor use and the amperage of your system.
Connect the charge controller to your battery bank. The controller stops your batteries from overcharging during sunny days.
Wire the inverter to the battery bank so it can convert DC power to AC power. Most household appliances need AC power to run.
Test everything before you rely on the system. Check all connections and make sure the voltage readings match what you expect.
What’s a simple explanation of how to connect inverters in a solar setup?
Your inverter connects directly to the battery bank with heavy gauge cables. The positive cable goes to the positive battery terminal and negative to negative.
The inverter pulls DC power from the batteries and converts it to AC power. This AC power then goes to your home’s electrical panel or directly to your appliances.
Make sure your inverter is sized correctly for your needs. It should handle both the continuous power draw and the surge power when motors or compressors start up.
Place the inverter close to the batteries to minimize voltage drop. Longer cable runs waste energy and can cause problems.
What should I look for when choosing solar system packages that include batteries?
Check if the battery capacity matches your energy needs. You want enough storage to get through cloudy days and nighttime use.
Look at the battery chemistry included in the package. Lithium batteries cost more upfront but last longer and need less maintenance than lead-acid batteries.
Make sure the charge controller included can handle your solar panel array. An MPPT controller works better than PWM for most setups.
Verify that all components work together at the same voltage. A 24-volt battery bank needs a 24-volt inverter and compatible charge controller.
Read reviews from actual users of the package. They’ll tell you about problems or quality issues the manufacturer won’t mention.
How can I avoid common pitfalls while setting up an off-grid solar system?
Don’t undersize your battery bank. Running batteries down too low every day kills them fast and costs you money on replacements.
Avoid cheap charge controllers that can’t protect your batteries properly. A failed controller can ruin an expensive battery bank overnight.
Don’t mix old and new batteries in the same bank. The old ones drag down the new ones and create imbalances.
Skip the temptation to use undersized wiring. Thin wires create heat and waste energy through voltage drop.
Never install panels where shade hits them during peak sun hours. Even a little shade on one panel can hurt the whole array’s output.
Plan for expansion from the start. Buy a charge controller and inverter that can handle more panels than you’re installing now.
Is there a beginner-friendly guide I can follow to design my off-grid solar system?
The components and installation process breaks down system design into manageable steps. You calculate your daily energy use in watt-hours first.
Divide your daily energy needs by your location’s peak sun hours. This gives you the minimum solar panel wattage needed.
Size your battery bank to store at least two days of energy use. This provides backup during cloudy weather.
Choose a charge controller rated for your solar array’s total amperage. Add 25% extra capacity as a safety margin.
Pick an inverter that handles your largest appliance’s surge power. Refrigerators and power tools need extra startup power.
Many DIY solar system guides include worksheets and calculators to help with the math.